So You Want to Be a Mining Magnate
Control raw materials and be the foundation for the entire Adalian system
Step 01
Find a lot near to your chosen resource field. You want to avoid building non-extraction facilities on lots with over 70% abundance, with the goal of extracting on lots at as high an abundance as possible. Focus on one resource at a time instead of looking for a “Goldilocks” lot that covers multiple materials.
In this case, the Moustachio clan is considering a Calcite mine.
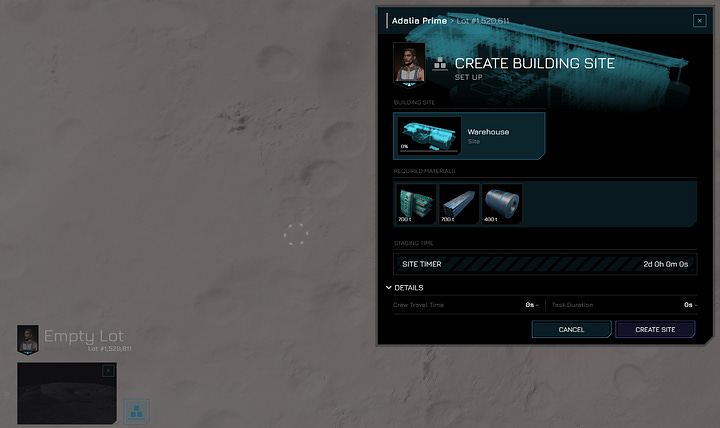
Purchase a lease on this lot and plan a warehouse. Purchase the materials needed to build the warehouse from a market. This will cost 141,037 SWAY (at starting seeded market prices). Ship the materials to your construction site. Once everything arrives, begin construction on your warehouse.


This effort will take at least 8 hours between materials transit time and actual construction, so your crew will be idle for a while. You will not be able to begin an extraction action without specifying a place to deliver mined resources, so the warehouse should be completed before finishing your extractor. Once materials are delivered and you have initiated construction, it’s time for the next step.
Step 02
LEASE a new lot with the highest single element resource percentage available that is as close to your warehouse as possible. Alternative strategies may be finding lots with multiple mineral abundances over 50% and rotating extractions as needed. Plan an extractor, purchase the materials (201,615 SWAY) and send them to your construction site. Initiate construction. Purchase one core drill (137 SWAY each - purchase multiple to save time) and deliver it to your warehouse.
Step 03
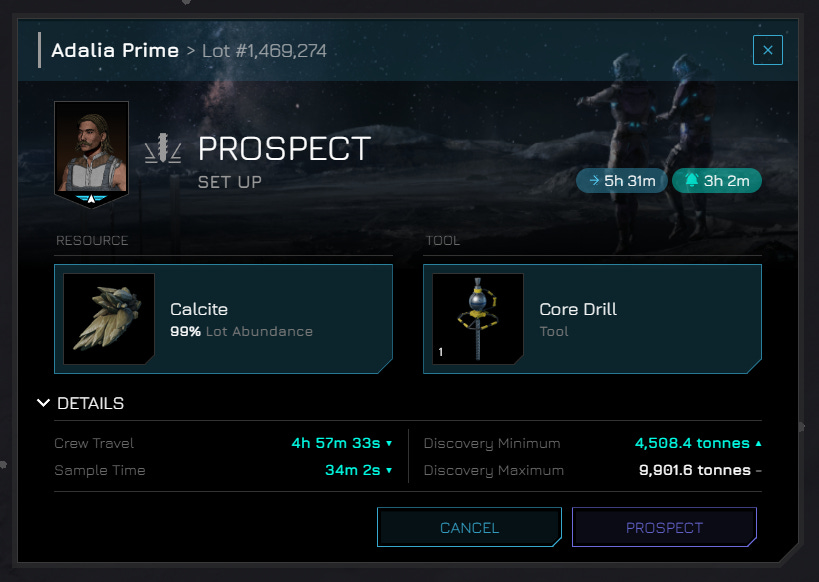
Once your extractor is built, begin a core sample for the highest percentage resource on your extractor’s lot.

Complete the core sample and note the discovered yield against the possible maximum yield.

Begin extracting. Consider how often you would like to log in and play, setting your extraction time around that same period.
In this case, core sample time + extraction crew travel time = roughly 18 hours (4 h 57m each way for both core sample and extraction, + 29m transport time). This is the minimum time you should set for your extraction duration. That won’t result in much product (about 1,250 tonnes in this case) so set your extraction to about 30% of the possible sample amount in tonnes. This will take about 29 total hours to complete.

Do not set the extractor to max (yet). Your raw materials will end up in your warehouse after you confirm the finish extraction transaction.
Step 04
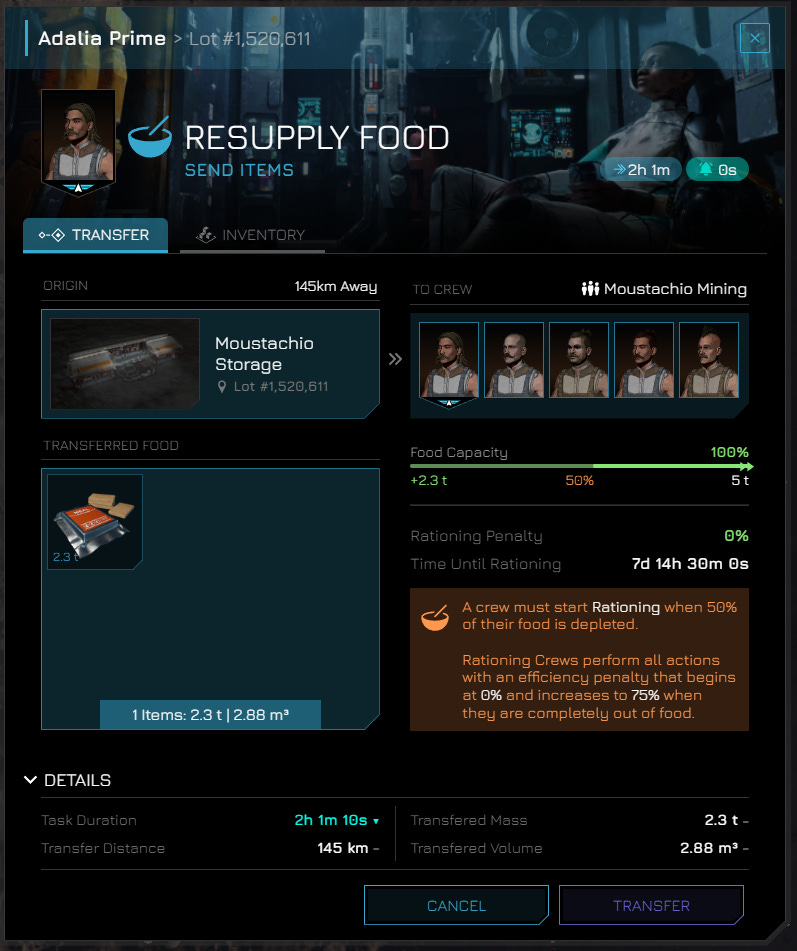
Collect your materials and send them to market. Sell at a competitive price or fill an advantageous limit order if demand is high enough. Save your SWAY for step 06 but don’t forget to occasionally purchase food from the market to keep your crew in optimal shape. Letting a crew’s food fall below 50% will force them to begin rationing, resulting in speed and productivity penalties.

Step 05
Begin a new core sample, then start mining again using the same time duration as before unless you find that a longer or shorter process works for your schedule (no point letting your crew go idle while you’re sleeping). From here on out it is best to log in at least twice per day, once to do a core sample, next to begin extracting.
It is time to consider improving your core samples. If you initial sample finds less than 75% of your possible available resource, it is worth the time to improve the sample so that your extraction efforts yield the most product for your crews time. There is no need to try and improving samples to their maximum. Diminishing returns will never allow a sample to access 100% of available resources under a lot.

Step 06
Either reinvest your profits over time or purchase more SWAY so you can repeat steps 02 through 05 as many times as you can until you have as many extractors as you can manage with a single crew. You should also build additional warehouses as needed so you can store more over time, offering larger impacts on market prices. Start small; construction materials are expensive.
Next steps
Depending on how often you plan on playing the game, a single crew can operate multiple extractors. Logging in once per day, one crew can handle 4-7 extractors and their associated core samples and selling items at market depending on travel distances. An average improved core sample will allow for a time/benefit balance of 2-2.5 days per extraction. Shorter extraction times are more efficient and let a crew operate with a similar total output to max-extraction efforts, but with fewer lot leases and structures. Logging in multiple times per day, a single crew can rotate between 4 or 5 high-efficiency extractors. This means lower operating costs at the expense of more player time per day.
Longer extraction times are less efficient but allow a crew to ladder 7 extractors. This is more of a “set it and forget it” mode of play, allowing a player to log in once or twice per day. There are higher operating costs to this method since it requires more lot leases and extraction structures compares with shorter time strategies. Maximum effort at an extractor can take 8+ days per action, so plan ahead!
Note that a crew can take new samples or improve existing (un-extracted) samples while structures are busy mining, so take advantage of crew idle time to set up for the next extraction or bring goods to market for sale.
Improving core samples can pay off in the long run, but only makes sense if you can log in multiple times per day. Your crew(s) will have slightly more idle time as a result, but if you can stay on top of the cycles then your yield per day will be higher than following a “set it and forget it” process. This process would be:
take core sample
improve sample at least once - note time it takes for sampling and improvement - this is your minimum operating extraction time
begin extraction of 33-60% of the sample - adjust action time to match your crew busy time from travel, sampling, and improving
once crew is ready, begin sample and improvements of a 2nd extractor site
begin extraction of 33-60% of the sample
repeat these steps for each of your extractors as they become available
The first third of a core sample is the easiest to access and extract, with each percentage after that taking longer for an equivalent amount of materials. There is more value in abandoning the latter part of a sample and beginning a new one, unless you are unable to log in multiple times per day. Ultimately, set extraction durations to fit your schedule.
Once you begin earning profits from extraction, you can invest them into scaling up your extraction, minting a merchant specific crew to have fewer fees when selling in markets, minting a specialty crew to do core samples and transport items, or build out more warehouses.
This could also be a time where you diversify into either refinement of your raw materials, or you build a pilot crew and begin shipping your mined resources to other asteroids.


